How to Declutter Your Kitchen
We know. The last thing you probably want to do this weekend is to declutter your kitchen. But in this Marie Kondo-ed world we’re living in, many people are feeling the urge to purge. We promise with just a couple hours of your time, some elbow grease, and a few new organizing products, you’ll love your kitchen once again.
How to Declutter Your Kitchen
Step 1
Purge! Is your kitchen full of mismatched items? Gadgets you don’t recognize? Accessories you never use? Toss, toss, and toss! Doing a major decluttering of your kitchen will make the organizing process infinitely easier. Some questions to ask yourself:
“Do I use this? Would I buy this today? How many do I have?”
Step 2
Create Groupings and Zones. Group items that serve the same purpose. For example, put all storage containers and Ziploc bags in the same area. Store cutting board near your knife block. A dditionally, start to think of your kitchen in terms of “zones” or areas that house similar items or are used for a shared purpose. For example, a typical kitchen may have the following zones:
Zone 1 – Items used on a daily basis (dishes, utensils, glassware)
Zone 2 – Prepping and Cooking (cutting boards, knives, pots, pans, baking sheets, large spatulas, tongs, oven mitts)
Zone 3 – Pantry (non-perishable food items, paper products)
Zone 4 – Accessories and Small Appliances (napkin holder, lazy Susan, stand mixer, blender, food processor)
Zone 5 – Drink Station (wine rack, wine glasses, bottle openers, corkscrew, ice bucket, coffee pot, mugs, cream and sugar)
Zone 6 – Cleaning (garbage bags, disinfecting wipes, dishwasher and dish soap, mop, broom, dustpan, Windex,
Zone 7 – Entertaining (large serving platters and bowls, punchbowl, pitchers, specialty glassware, specialty table linens).
Step 3
Tackle Each Zone. Once you have purged and identified your zones, begin to tackle each one. Below are some expert tips for organizing some of the more problematic areas in our kitchens.
- Get the most out of your pantry. Use the space on the floor of your pantry for large, bulky items like dog food and cases of soft drinks. Keep the foods that your family accesses most often (think cereal, snacks, pasta) at eye level and accessible. As mentioned above, organize your pantry into zones (baking items, grains, spices, etc.)
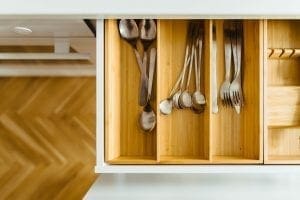
- Makeover your silverware drawer. Once you’ve purged, take everything out of the drawer and give it a thorough cleaning. Buy new organizers in colors or materials that match your kitchen. Be sure you have some larger organizers to hold items like spatulas, ice cream scoops, and corkscrews.

- Take control of your Tupperware! Again, remove everything from your Tupperware drawer or cabinet. Toss any items that do not have a matching top or bottom. Use a drawer divider like this one to keep the lids separate from the containers.
- Organize pots and pans. Ideally, you have a couple of big, deep drawers or cabinets in which you can store your pots and pans. Store the ones you use most often in the most convenient location. Place the larger, less used items in the harder-to-reach places.
- Clear out your cleaning products. You probably have more cleaners than you actually need. Sort through them all and only keep what you use most (likely only two or three products).
- Hang items under the sink. Use a spring-loaded curtain rod to hang spray bottles under the kitchen sink. Doing so will free up lots of space under your sink for other items you want to keep on hand. Pro tip: hang a coffee cup from this rod to store extra sponges. Brilliant!
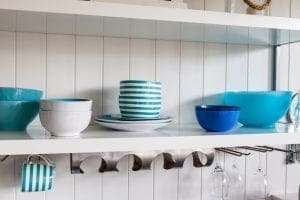
- Maximize storage. Store grains (flour, rice, cereals) in clear glass containers, which hold more (and keep messes and spills under control). Use baskets to group items like lunchbox snacks, plastic bags, etc.
- Use doors and walls. Mount as much as you can on the walls, such as the phone, calendars, bulletin boards for notes, etc. to keep the counter clutter to a minimum. Other ideas including using a wall- or door-mounted spice rack, hanging knives on the wall with a magnetic knife block and placing hooks inside doors to hang items like measuring cups.

The Bottom Line
It’s actually very easy to declutter your kitchen. Purge, clean, group, and organize! Tackle this project one “zone” at a time and it won’t feel so overwhelming. Trust us, you’ll be thrilled with the final result and be glad you spent the time on this project.
Can we help you love where you live? Please let us know. Contact us today.
Contact Us
For more tips like these, sign on for our monthly blog roundup.


